 |
 |

Chatillon DFS-R-ND Series Force Gauges for Smart Load and Torque Sensors
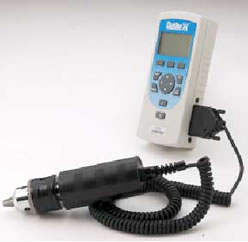
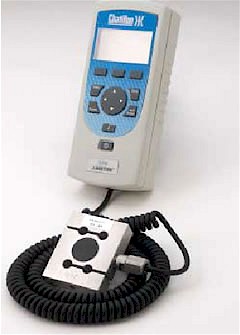
| The Chatillon DFS-R-ND Series force gauges supply accurate load and torque measurement in a common gauge. Ideal for hand held or test stand applications, the DFS-R-ND gauge may be equipped with smart loadcells or torque sensors. The auto-recognition feature knows whether a load or torque measurement is required. Measurement accuracy is bettver than 0.25% full scale when used with interchangeable sensors. Accuracy is better than 0.1% full scale when specified with a dedicated SCL load sensor. A large, easy to read, high resolution dot matrix LCD display supports a variety of standard gauge functions, including normal and peak readings, high / low limits, setpoints, pass / fail results, statistical results, load averaging, load comparisons, percentage and sharp break detection, sensor actuation and direction. Measurements are displayed in ounce, gram, pound, kilogram or Newton units or in oz-in, g-cm, lb-in, N-cm and N-m units. The Chatillon DFS-R-ND force gauge comes standard with an RS-232 cable, carrying case, battery adapter / charger, and NIST Certificate of Calibration with data.
|
|
|||||||||||||||||||||||||||||||||||||||||||||||||||||||||||||||||||||||||||||||||||||||||||||||||||||||||||||||||||||||||||||||||||||||||||||||
Features:
Specifications
SLC Loadcells and STS Torque Sensors
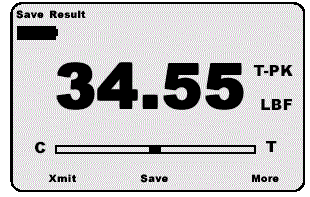
Do More... Pay Less! The new Chatillon DFS series force gauges deliver more features without compromising easy of use, accuracy and, very importantly, costs to you. You'll do more with a Chatillon DFS series gauge and you'll get the reliability and quality that you've come to expect from Chatillon force measurement instruments. Easy to Read Display A large, easy to read dot matrix display can display up to eight lines of information. The high resolution display features contrast adjustments and can be inverted when required. The display can even be "hidden" at the press of a button. A load bargraph indicated load direction, measured load and safe load and helps to prevent overloads. The integral loadcells feature mechanical overload protection of 150% full scale. Single Touch Operation The rubber keypad features dedicated and dynamic function keys. The function keys correspond to displayed options and guide the user during operation. A navigation pod lets you navigate through the menus and to scroll and change values quickly. The innovative i key can be used to display critical information on the gauge such as gauge capacity and resolution, battery life, loadcell overload history, even service information including last calibration date or the location of service centers. Data Outputs and Personal Computer Integration The DFS force gauge features RS-232 and Mitutoyo Digimatic digital outputs. the gauge also features a ±2Vdc analog output. Measured values may be transmitted to an external device using a manual command at the gauge, or a measured value may be transmitted based on an an externally driven command, e.g. from a personal computer or other serially interfaced device. Comprehensive Results The rubber keypad features dedicated and dynamic function keys. The function keys correspond to displayed options and guide the user during operation. A navigation pod lets you navigate through the menus and to scroll and change values quickly. The innovative "i" key can be used to display critical information on the gauge such as gauge capacity and resolution, battery life, loadcell overload history, even service information including last calibration date, or the location of service centers. Dependable Measurements The DFS series force gauge features an internal loadcell sensor that delivers repeatable, accurate results. The innovative load bargraph shows dynamic load, direction of load and warns you of pending overload conditions. Calibrate and Verify Status The DFE-series force gauge incorporates flash memory and hosts a set of self-diagnostic functions for monitoring the display, keypad and electronics. Using the "i" key, you have immediate access to battery conditions, including estimated battery life remaining. You can also view loadcell status, including the number of overloads that have been applied to the gauge. Zero offset verification is standard and a step by step calibration procedure is built into the gauge, allowing you to calibrate your DFS gauge with certified standards. ...You Get More from a Chatillon Gauge Normal and Peak Modes The DFS-R-ND digital force gauge will display Normal and Peak tension and compression loads. Results may be displayed in ounces, pounds, grams, kilograms or Newtons. Use the UNITS key to sequence through the available units. You may define and establish your Default Units during instrument setup. You can increase the size of the displayed information using the keypad.
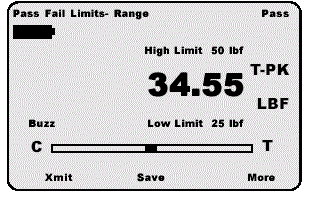
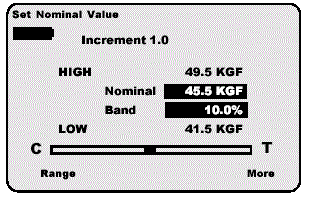
Auto Scaling The DFS-R-ND gauge, when equipped with a load sensor, will display loads in the following units: oz, g, lb, kg or N. If equipped with a torque sensor, selecting the Units key will display torque in in-oz, g-cm, in-lb, kg-cm and N-m. You may define and establish your default units during instrument set up. High and Low Load or Pass-Fail Limits The DFS-R-ND series gauge may be configured with High and Low Load Limits or Pass-Fail Limits. Load limits allow you to establish setpoints for your testing. If the gauge exceeds a setpoint value, the gauge can provide a visual and audible alarm. You can also set up the gauge to operate as a pass-fail system. You can set up a pass-fail limit based on a limit range or a nominal value with a percentage bandwidth. Based on your setup, the gauge will provide you with a Pass-Fail indication
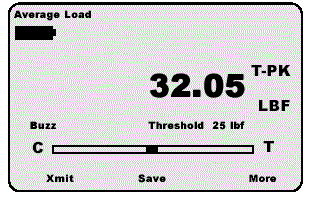
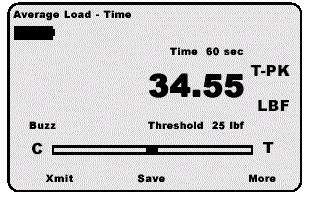
Contact Closure The contact closure feature can be used to freeze the display at a load value equal to the "make" or "break" on an electrical contact. Load Averaging Two methods of load averaging are standard with your Chatillon DFS-R-ND force gauge. Load averaging is useful to determine load characteristics of long test periods or for samples with characteristically noisy load readings Load Method
Time Method Statistical Results You may save and store up to 10 results in instrument memory for later recall or to calculate statistical results. The gauge labels each result and indicates memory capacity. The gauge will alert you when memory is full. Statistical results include:
Simplified Setup Menus and intelligent prompts make gauge setup fast and easy. Gauge options are presented in "List Format". Using the navigation pod and function keys, you simply select the functions and parameters required. The gauge will guide you through the setup process. Default settings are provided and a "Quick Reset" allows you to re-establish defaults with a single key press. Using the standard RS232 output, you can print your gauge setup parameters for record archiving or to use as a setup template for other DFS force gauges in your plant.
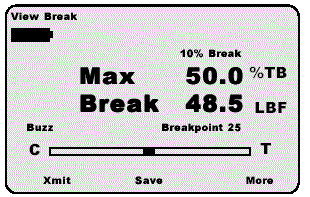
Percentage and Sharp Break Detection Break detection is provided and two types of breaks are supported. A sharp break can be used to detect whenever the load measurement drops 5% from a peak load. Alternatively, you may override the sharp break and set up the gauge with a percentage break detector. The percentage break detector allows you to set the drop percentage that is used to define a break. This type of break is useful on samples with high elastic characteristics.
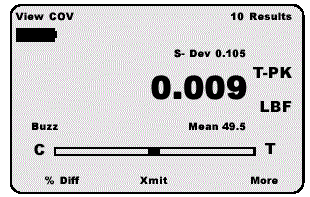
Load Comparison Load comparisons of up to two sets of 5 results may be measured using the DFS-R-ND force gauge. The gauge will measure and store up to 5 results for each of two tests (10 results). The gauge will then display the first set of results with the second set of results and calculate statistical relationships such as percentage difference, COV, variance and standard deviation. This feature is ideal for functional capacity testing.
Self Diagnostics The DFS-R-ND series force gauge incorporates flash memory and hosts a set of self-diagnostic functions for monitoring the display, keypad and electronics. Using the "i" key, you have immediate access to battery conditions, including estimated battery life remaining. You can also view loadcell status, including the number or overloads that have been applied to the gauge. Zero offset verification is standard and a step by step calibration procedure is built in, allowing you to calibrate your DFS-R-ND gauge with certified standards. |
||||||||||||||||||||||||||||||||||||||||||||||||||||||||||||||||||||||||||||||||||||||||||||||||||||||||||||||||||||||||||||||||||||||||||||||||
