|
|
Pesola 80035 Macro-Line Spring Scale 35 kg x 500g |

|
| Pesola scales to determine the weights of numerous specimens, or attach the optional pressure set to use them as dynamometers to determine the amount of pressure needed to move objects. With the optional pressure set attached, you can also use these scales as penetrometers to test soil compaction. more ... |
|
Scales >
Hanging Scales >
Mechanical Hanging Scales
|
|
|
|
|
|
Features
Two instruments in one! Use these precision Pesola scales to determine the weights of numerous specimens, or attach the optional pressure set to use them as dynamometers to determine the amount of pressure needed to move objects. With the optional pressure set attached, you can also use these scales as penetrometers to test soil compaction. Pesola scales work in any position — even overhead. Each scale features high quality, non-corroding components housed in an abrasion-resistant anodized aluminum case. Two-sided graduations are inversely proportional so you can easily read measurements from different positions. Tare screws allow you to “zero-out” the weight of various containers from 15% to 25% of the scale’s capacity. Drag pointers measure the maximum readings obtained per weighing. Handle, drag pointer, and plastic case included. Upper and lower suspensions rotate.
Weight:
2.00 lb
|
3 Year Manufacture Warranty
|
Other Pesola Macro-Line Spring Scales
|
Specifications
| Model |
80005 |
80010 |
80020 |
80035 |
80050 |
80015 |
80210 |
80420 |
80150 |
80049 |
80098 |
80196 |
80490 |
| Capacity x Resolution |
5 kg x 50 g |
10 kg x 100g |
20 kg x 200g |
35 kg x 500g |
50 kg x 500g |
5 kg x 50 g
10 lb x 2 oz |
10 kg x 100g
20 lb x 4 oz |
20 kg x 200g
40 lb x 8 oz |
50 kg x 500g
100 lb x 1 lb |
50 N x 0.5 N |
100 N x 1 N |
200 N x 2 N |
500 N x 5 N |
| Accuracy |
±0.3% |
| Tare |
~ 20% |
| Construction |
high quality, non-corroding components housed in an abrasion-resistant anodized aluminum case |
| Includes |
Standerd Hook, Handle, Drag Pointer |
| Plastic case |
Included |
| Warranty |
Three-year warranty |
| Country of origin |
Switzerland (CH) |
|
|
|
|
* within the 48 continental US States
|
|
Optional Accessories
more info
|
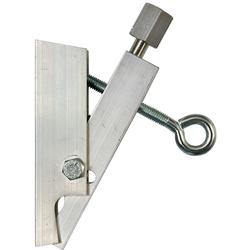
Pesola 8.010 Heavy duty clamp for Macro-Line Scales up to 35 kg
The heavy duty clamp fits all Macro-Line Scales up to 35 kg (e.g. replacing the standard hook). Two clamping ranges can be adjusted. It rotates and features high clamping force. Please observe the instruction for transformation.
|
|
more info
|
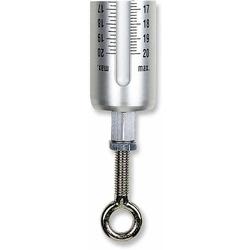
Pesola 8.018 Optional Adaptation Set for Macro-Line Scales
The Adaptation set with eye-bolt fits all Macro-Line Scales (replacing the standard hook). Please observe the detailed information of instruction for exchange.
|
|
more info
|
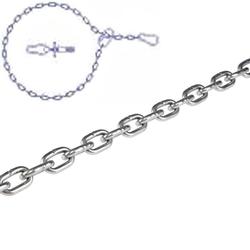
Pesola 8.060 Chain / Suspension
The 60 cm long chain fits all Macro-Line Scales up to 50 kg. It can be adjusted to different lengths. Included are 2 snap hooks and parts for fixing on wall or ceiling.
|
|
more info
|
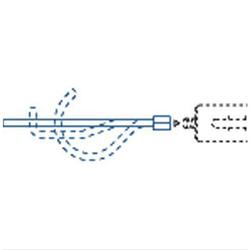
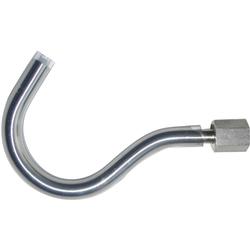
Pesola 8.065 Adaptation rod
The Adaptation rod fits all Macro-Line Scales up to 50 kg (e.g. replacing the standard hook). Before assembly it can be bent according to customers need. Please observe the instruction for transformation.
|
|
more info
|
Pesola 8.066 Large Hook with protective Plastic Coating
Lower suspension - accessory for all Macro-Scales. The hook rotates in the M8 nut and also swivels slightly. It features a large diameter and protective coating is ideal to hook into door handles to check door closing or opening forces or resistance of sliding doors. Also suitable to measure stability of handrails on balconies etc. Please carefully observe the “instruction for exchange of lower suspension” in order to avoid defects on the marker of the scale.
|
|
more info
|
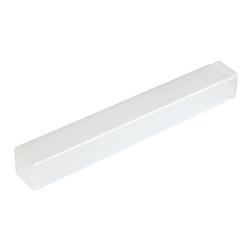
Pesola 8.678 Protective Tube Case
Suitable for all Macro-Line Spring Scales. The two transparent, durable and square tubes slide into each other and therefore adapt to the length of the product. Macro-Line Scales even fit into this packaging together with their pressure set 8.004.
|
|
more info
|
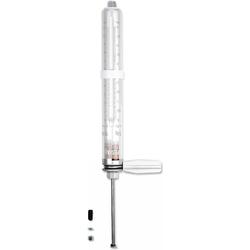
Pesola 8.004 Optional Pressure Set for Macro-Line Scales
With this accessory all Macro-Line Scales can be easily transformed into a pressure measuring instrument within 20 seconds.
|
|
more info
|
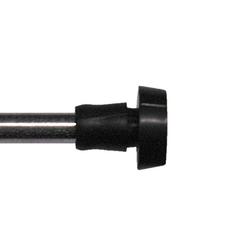
Pesola 8.070 Large protecting cap for pressure rod 8.004
Accessory for pressure set 8.004. Its flexible round surface spreads the pressure on the measuring object.
|
|
more info
|
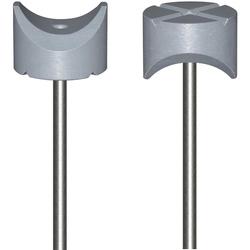
Pesola 8.032 Multifunctional cap for pressure rod M5 of 8.004
Depending on the surface and shape of the measuring object, select one of the 2 possible ways (A / B) of assembly and screw on the „Multi-functional cap for pressure rod M5“ accordingly on the pressure rod of the pressure set 8.004. It is also easy to adapt the cap by e.g. grinding down one tip or in order to protect a measuring surface to glue a self adhesive protector on the flat side of the cap (2 images).
A: Concave rounding with two canted sides pointing at the measuring object
- Is designed to measure pressure forces on round objects without slipping off.
- The 2 edges, creating a 90° angle, serve to measure pressure forces in reentrant edges.
Application
- Pressure measurement on bars of panic- or fire doors (emergency exits).
- Measure opening forces of door handles.
- Closing forces of fire doors, windows, handles frames etc.
B: Round, flat side with two v-shaped recesses pointing at the measuring object
- Suitable to measure the pressure forces on flat objects.
- The two v-shaped recesses serve to measure pressure forces on projecting edges.
Note for best measuring results
In general PESOLA Scales measure very precisely. However the way of operation for maximum forces measurement may have a remarkable influence on the result. Please observe the following:
Transform the scale for pressure measurement.
- Screw on the „Multi-functional cap for pressure rod M5“ # 8.032, the suitable side ahead. Do not fully tighten the cap. This way you can slightly rotate it in order to fit the round or square object to be measured.
- Hold the scale in measuring position, without executing any force yet and adjust the zero position with the tare screw.
- Move the drag pointer towards zero.
- Hold the scale on the radial grip, the other hand holding the opposite end of the tube, stabilizing it. Do not touch or hinder the drag pointer during measurement.
- Start the pressure measurement. Keep the axis of the scale rectangular to the measuring object in order to minimize a possible inner friction.
- Slowly and continuously increase the pressure. It is important to maintain the speed of axial feed, to get comparable results.
- e.g. very fast axial feed => higher measuring results
- e.g. very slow axial feed => lower measuring results
- We therefore recommend to build up the measuring force at an average constant speed:
- Therefore count the seconds: 21 ...... 22 (while you raise the force by 1/5 of the total scales capacity or preferably an even division of the graduation) ....... 23 (raise the force by a further step of the same length within another second) .......... 24 (and so forth) ……… until the measuring object moves back or clicks into place while the scale simultaneously slightly springs back. At this moment of the maximum force the drag pointer stands still).
- Reduce the force back to zero, not touching the drag pointer.
- Read the maximum force of measurement at the upper edge of the drag pointer.
- Repeat the measurement with the same parameters for 3 times and document the values.
- The arithmetic average of the 3 values provides reliable result.
|
|
|
|
|
|
|
|
|

